Do you know how to upgrade your TFS 2010 databases? (the big one)
Updated by Brady Stroud [SSW] 1 year ago. See history
123
We recommend doing a move to a new environment because it has a much easier rollback path if something goes wrong.
Note that these steps will also work for upgrading from TFS 2012 RC to RTM, or RTM to Update 1. These are the steps to migrate and upgrade to a new environment:
- Send an email to let everyone know the server will be offline
- Take the TFS 2010 server offline
- Copy the TFS 2010 database backups to the TFS server or the new SQL Server instance. Make sure the URL is accessible from the TFS server via a network share.
- Install Team Foundation Server 2012 or TFS 2012 Update 1 (see Damian Brady's experiences).
- Make sure you have access to coffee while it's installing - it could take a while!

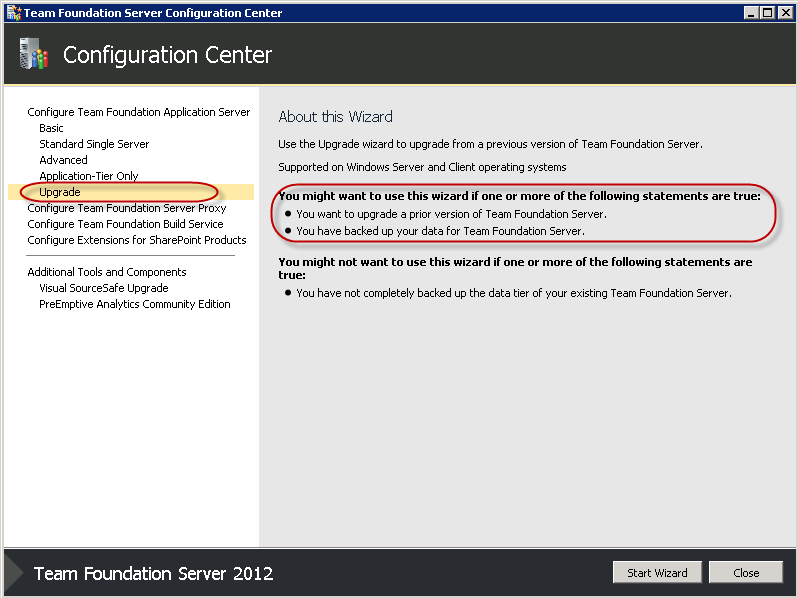
- After the install has completed, the Team Foundation Server Configuration Center will start
- Select Upgrade | Start Wizard
- Launch the Database Restore tool by clicking on the link
- If necessary, change the Target SQL Server Instance and click Connect
- In the Restore Database screen, Browse, then navigate to the folder with your database backups. Make sure all of them are ticked, then click Restore.
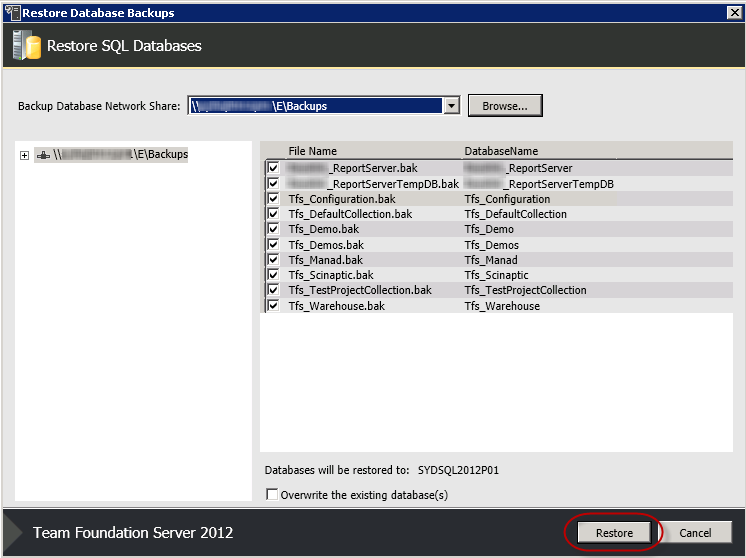
- Click Close, then click Next in the Upgrade Wizard
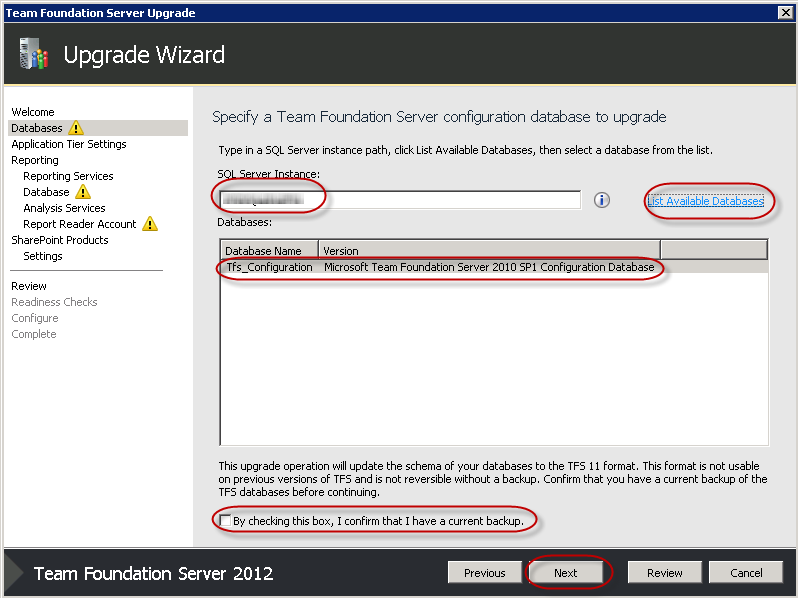
- Choose the configuration database by specifying the SQL Server Instance and clicking List Available Databases
- Check "By checking this box, I confirm that I have a current backup.", then click Next
- Leave Network Service as the service account for the Application Tier, then click Next
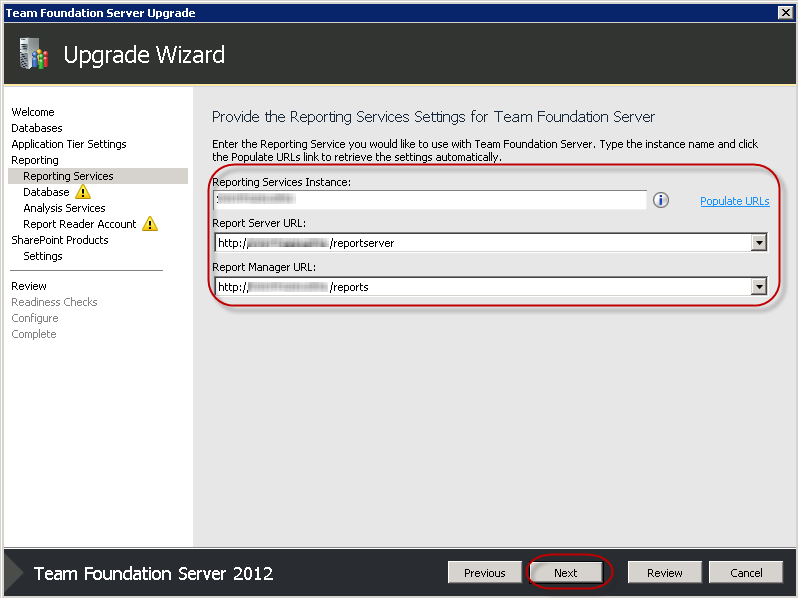
- Check the checkbox to confirm we want to configure Reporting Services, then click Next
- Make sure the Reporting Services instance and URLs are correct, then click Next
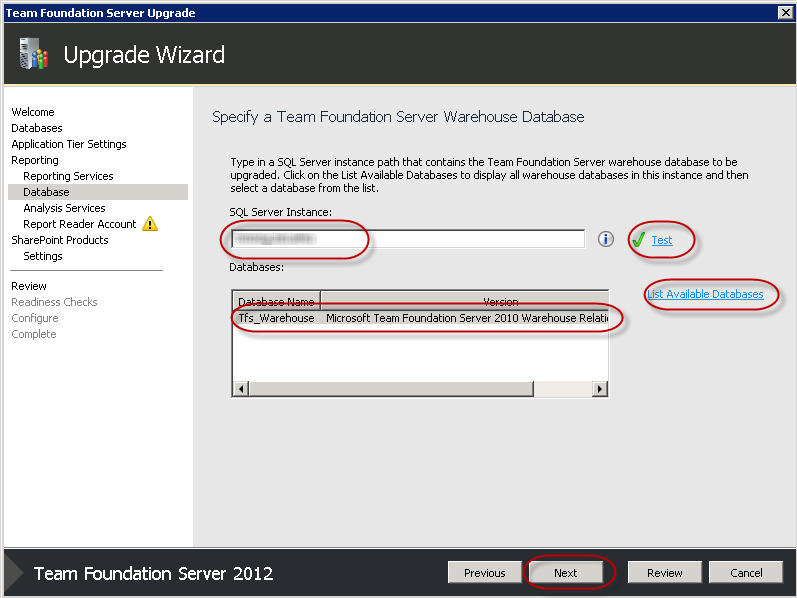
- Update the SQL Server Instance for our Warehouse Database, and click Test to test the connection
- Click List Available Databases and check the Tfs_Warehouse database is shown, then click Next
- Click Next on the Analysis Services page
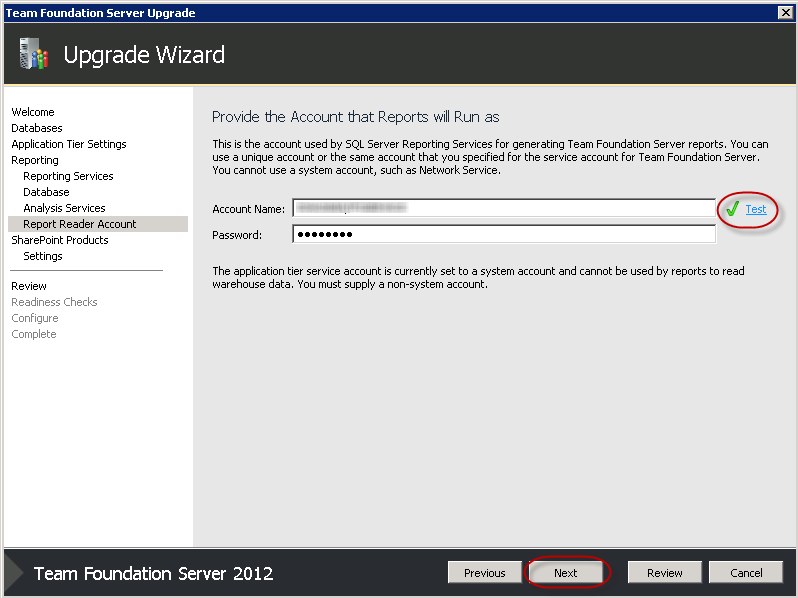
- Provide details of the TFSService account your reports will run as then click Next
- Check the checkbox to say we want to configure SharePoint, then click Next
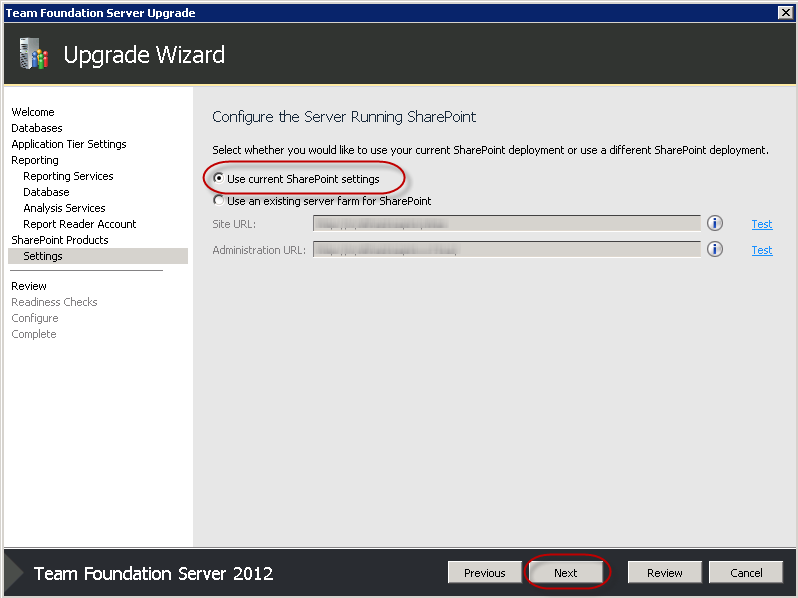
- Choose "Use current SharePoint settings", then click Next
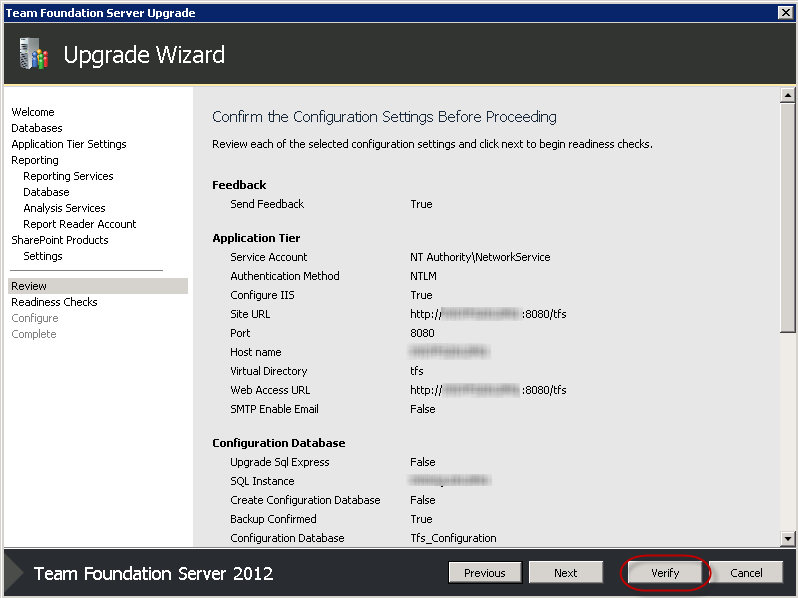
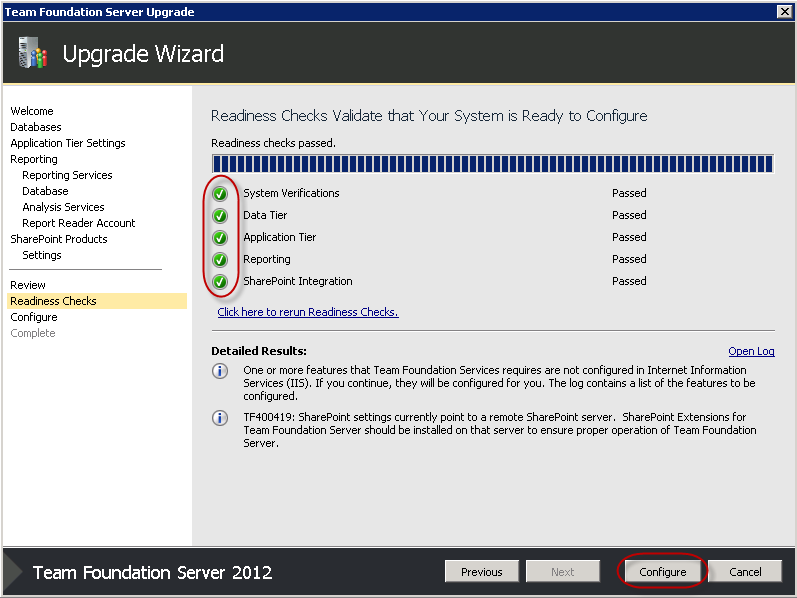
- Confirm the details on the Summary page and click Verify
 Note: At this point, you may be asked to reboot and start the wizard again. Don't despair - it's quicker the second time!
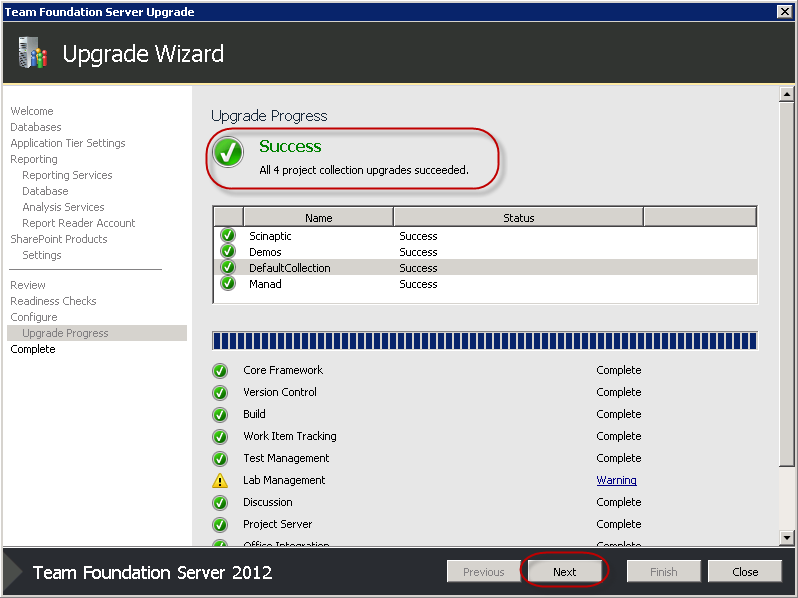
 - Once you have all green ticks, click Configure
- Have a coffee
- Click Next
- Click Close, then Close again.
- Change the DNS entries for your TFS server to point to the new TFS 2012 server
 Note: It's a good idea to get the SysAdmins involved at this stage